
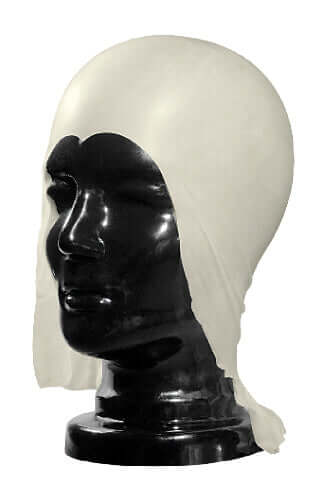

Grimas Bald Cap, flint skull cap
by Grimas
Original price
$19.00
-
Original price
$19.00
Original price
$19.00
$19.00
$19.00
-
$19.00
Current price
$19.00
Availability:
Low stock
SKU GR195
- Description
- Features
- Usage
-
Description
The Grimas Bald Cap flint skull cap is of high quality. You glue this flint cap to the skin with Grimas Mastix Extra skin glue . Make up the cap in the right skin tone to get a good, realistic result and effect of the person in question being bald or as a basis for a cool special effect makeup. This flint cap is very elastic, transparent and intended for single use for creative projects and makeup looks for film, TV, theater, Halloween, cosplay, lifecasting, etc. The cap is available in one size and is sold individually.
-
Features
- High quality of the flint cap
- Glue on with Grimas Mastix Extra skin glue and apply make-up to the skin
- One size
- Sold individually
-
Usage
Application
- Degrease and wash the skin with Grimas Cleansing Lotion before you can start working on the skin. Wipe the skin dry with a napkin.
- Comb the hair of the wearer of the flint cap. Use hair products if desired to straighten hair.
- Stand behind the model who will be wearing the flint cap and ask her to hold her thumbs up with her nails against her forehead so that the cap can be put on from the front to the back using her thumbs.
- Make sure the front point is centered and there is enough space under the hairline.
- Adjust the flint skull cap so that it fits tightly and smoothly against the entire head and without visible folds.
- First gluing: Fold up the edge at the front and place a strand of Grimas Mastix Extra skin glue approx. 2 cm below the hairline. If the model has a wrinkle in the forehead, you can advantageously follow it to get a more natural transition between the cap and the skin. Place the line of glue down to the temples. Fold up the edge of the pan and apply glue and press lightly to distribute the glue on the cap. Let the glue dry for 15 seconds and fold the brim down again: make sure the flint skull cap closes around the head without creases.
- Free up the ears by marking the ears with a makeup pencil. This marking will disappear when you later finish the edges with acetone to melt away the excess flint cap.
- When you are now going to cut the flint skull cap around the ears, it is important that you stretch the cap properly and cut a little at a time so that you do not remove too much.
- Second gluing: Ask your model to sit upright and straight. Put a string of glue with Mastix Exta skin glue about 2 cm along the sideburns. Make sure this line lines up with the other line of glue you put in the pan, so they connect perfectly.
- Then do as before, fold up the edge of the cap, apply glue, take down the edge, press lightly and fold up again. Allow to dry for 15 seconds before folding the edge of the hat back down along the sideburns.
- Now it's time for the back of the head. Fold up the edge of the cap again. Apply a strand of glue about 2 cm from the hairline on the back of the neck so that it goes about halfway behind the ears. Pull the flint skull cap down over the back of the head so that the cap gets glue and pull both edges forward. Make sure it closes properly and tightens. Fold the edge of the cap back up, let the glue dry for about 15 seconds, then close the flint skull cap and press down to smooth.
- Work off excess and joints with cotton swabs and acetone. The flint cap melts in contact with acetone and in this way you create nice invisible edges by dabbing on acetone to remove the joints.
- Make up the flint skull cap with Grimas Camouflage Make-up Pure colors from the Crème Make-up Pure series.
- Work with a spatula or a dry, clean makeup sponge. Apply Camouflage Make-up Pure with a dabbing motion, do not brush so that there are streaks. Work outwards from the center of the rubber flint and down towards the edges.
- If you want, you can fix and matt down the color with Grimas Transparent Powder , Fixing Powder, Make-up Powder or Color Powder.
Removal
- To remove the flint cap, dab with a cotton swab soaked in Grimas Mastix Remover . Dab over the adhesive strip so that it releases. Glue and make-up residues are removed with Mastix Remover.
- Massage the skin with Grimas Multi Remover Pure or Cleansing Cream, then dry with a napkin.
- Cleanse the skin with Grimas Cleansing Lotion as the final phase
Storage
- Store cool and dry